Showing posts with label ubuntu. Show all posts

Nov 13, 2013

How To Torrent TV Shows Via RSS Using Deluge

I mentioned the other day that I preferred Ktorrent over Deluge for RSS Bittorrent downloads. Well I lied. I found Ktorrent to be way more resource intensive as Deluge, so I switched back. I also said Deluge's RSS plugin didn't work well for me. That was because I wasn't doing it right. That's where this article comes in.

I'm sure many of you want to download your favorite TV shows using a service like ShowRSS on Linux, but don't know how. Or you see tutorials on using Flexget and another client, and it seems too complicated. Well, you're not alone.

Using Deluge to download torrents via RSS is actually pretty easy, and here's how you do it.
  • Download the YaRSS2 Plugin
  • In Deluge Click Edit > Preferences > Plugins
  • Click Install Plugin and browse to the YaRSS2 .egg file you downloaded in the first step.
  • Check the box next to YaRSS2 in the plugins list then click Apply to activate it
  • In the left pannel you will now see YaRSS2, click on it
  • On the right click on the RSS Feeds tab
  • Click Add Feed
  • Enter a name and the URL for your feed then click Save

  • Click on the Subscription Tab
  • Click Add Subscription
  • Enter a name, select the feed you just added, and enter any filters you want
  • Click on the Options tab to change download locations
  • When you are done click Save
  • Now under the Subscriptions list, right click the subscription you just made and click Run this subscription
Now you will notice that your torrents will begin downloading. Deluge is smart enough to record the time stamp of the last download too so that it doesn't accidentally download the same file twice.

That's it! Just go through this process for any other shows you want to download, and you are good to go. No text config files to edit, nothing! Just pure Torrent RSS Downloading!
Enhanced by Zemanta

Sep 29, 2009

VMWare Tools For Linux On The Easy

Last year, I wrote about how you you go about installing VMWare tools on an Ubuntu virtual machine. That method still works, but it isn’t the optimal nor easiest way of doing it. Not according to my boss anyway.

My boss is the guy who really introduced me to Linux, and really knows his sH!7. He said that if you manually install the VMWare tools pack then later decide to upgrade the kernel it will break your VMWare tools install, and you will have to remember to manually uninstall it, then re-install it. He recommends using your distro’s pre-packaged Open-VM-Tools!

He said that since your distro maintains Open-VM-Tools in their repository, chances are pretty good that they will keep them up to date when they roll out changes to the kernel, and will keep you running smoothly after an upgrade.

To install Open-VM-Tools in Ubuntu it is as simple as using apt-get:

>sudo apt-get install open-vm-tools

One thing I did notice with using this is that for an Ubuntu virtual machine, vSphere shows the tools status as OK:

Ubuntu VMWare Tools

On Gentoo, my boss’s distro of choice, vShpere shows the VMWare tools status as Unmanaged:

gentoo VMWare toolsStick that in your pipe and smoke it Gentoo! Just kidding, all joking aside, my boss assures me that even though it appears as Unmanaged in vSphere you still get all of the benefits as the manual install of VMWare tools such as:

  • Improved video compatibility & performance
  • Improved network compatibility & performance
  • Copy and paste between the host and guest
  • Improved memory utilization
  • Improved CPU utilization

Do you use a lot of Linux virtual servers in your environment? Do you already use Open-VM-Tools? Do you manually install the tools? What’s your VM story? Hit us up in the comments!

Sep 24, 2009

How To Get osTicket To Authenticate With AD

One of my first tasks at the new gig was to set up an open source ticketing system. We decided on osTicket. My boss said I could use any distro I wanted, the only requirement was that it had to authenticate with AD.

He sent me some links to possibly help get it working, and one was how to set up LDAP authentication in Linux. If you have been reading my blog for a while, then you know that I discovered an even easier way to get Linux to authenticate with AD using Likewise-Open. That was only part of the puzzle though.

We not only had to get Ubuntu (The distro I chose) to authenticate with AD, we had to get osTicket to authenticate with AD using Pam. Here is what we did:

  1. Installed Likewise-Open using my instructions
  2. Installed a few packages:

    sudo apt-get install php5-imap postfix php5-pam-auth pecl php_pam mcrypt php5-mcrypt

  3. Modified /include/class.staff.php as follows

    sudo nano /var/www/include/class.staff.php

    Replace

    /*compares user password*/

    function check_passwd($password){

    return (strlen($this->passwd) && strcmp($this->passwd, MD5($password))==0)?(TRUE):(FALSE);

    }

    with

    /*compares user password*/

    function check_passwd($password){

    if (pam_auth($this->username, $password, &$error)) {

    return TRUE;

    } else {

    return FALSE;

    }

    }

  4. Restarted Apache
  5. Done!

Also to control spam since anyone in the world can create a ticket with osTicket without authentication, we also added recaptcha using these instructions here: (Captcha in osTicket)

Do you use osTicket? Like it? Dislike it? Do you have it integrating with AD? Did you do the same thing, or do something different? Let us know in the comments.

Special thanks to henkka on the osTicket forum.


NOTE: If you are using osTicket 1.6ST Read my post here: (AD Authentication in osTicket 1.6.0)

Jun 17, 2009

Why an Ubuntu Workstation is better than Windows at work

A few weeks ago I decided to say damn the man and install Ubuntu as my operating system at work. So far there isn’t anything I am unable to do on Ubuntu that I couldn’t do in Windows to get my work done.

Today I was a little light on the workload so I decided to browse the Ubuntu repositories to see what games were available. Of course, two that popped right out at me were some of my favorite Open Source games;  Tux Racer and SuperTux!

These two games got me thinking about how much cooler the free games for Ubuntu are compared to the free games that come with Windows. I also got to thinking about how many people play solitaire and minesweeper at work.

Because of that, I decided to make this little video:

What do you think? Am I wrong on this? I suppose there are lots of free games you can download for Windows too, including SuperTux and Tux Racer, however these are available directly in the repositories for Ubuntu.

What games do you like to play on your Linux system? What free games do you play in Windows? Let me know in the comments.

Jun 4, 2009

I finally Got the Global Address To Work in Evolution for Jaunty!

This post is going to be relatively small and quick, but I thought I would put it out there because I had the damnedest time getting the Global Address list in Evolution to work in Ubuntu 9.04.

First off let me say that I hate Evolution. I don't use it on my Linux machines at home at all! If only someone would make a good OWA plugin for Thunderbird, then things would be better! Until then, Evolution is the only Exchange game for 'nix systems in town.

So back to my problem. I could not access the Global Address List! No matter what I put in, I would get an error saying that Evolution couldn't access the Global address list. Depending where I was in Evolution, here are the errors i got:

Error Loading Address Book


Or I would get this error:
Error Loading Address book.

This address book cannot be opened. This either means that an incorrect URI was entered, or the server is unreachable.


It was my fault though, I mistakenly thought that I should be putting in the FQDN of the Exchange server were you input the URI for the Global Catalog Server. I also read somewhere that you are supposed to put the URL of the OWA server. None of those worked. What did work though was putting in the FQDN of the local Domain Controller!

If you don't know where to do that, click on Edit > Preferences. Select your Exchange account and press the Edit button.


Click on the Receiving Options Tab, and under Global Catalog Server Name, input the FQDN of your local Domain Controller then click OK. You will have to restart Evolution for the changes to take effect.


After I did that, I was able to access the GAL, and grab contacts straight from Active Directory!

Now I believe this only works behind the corporate firewall. I am not quite sure what to do if you are wanting to access Exchange email from home on your Linux box. If you have gotten the GAL to open from outside of the network, hit me up in the comments to let me know what you did!

Jun 2, 2009

How To Dual-Boot Windows 7 and Ubuntu 9.04

I usually wouldn't write something like this. I mean, everyone know how to do a dual-boot setup right? I thought this setup would be just as simple. I mean I've done dual-boot installs hundreds of times, why would this one be any different?

I don't know about your system, but when I tried to dual-boot my Dell Mini 9 with Windows 7 and Ubuntu 9.04 I had some problems. You see, I always start with the Windows Install first, then install Linux last so Grub can take over as the bootloader. I am sure most of you do too!

That's what I did first. I booted up with my Windows 7 DVD, and deleted all of the old partitions, then I partitioned my drive in half and installed Windows 7. After that, I booted up with Ubuntu, and started to install, and here is where I had the problem. Ubuntu didn't see the Windows 7 partition as an operating system! When the installer got to the disk partitioner, it showed that I had 32GB of free space! That was strange because when I mounted the hard drive from the live CD I could see all of the Windows 7 files. WTF!?!

I'm not sure what it is, but Ubuntu doesn't understand how Windows 7 does it's partitioning even though Windows 7 is using the same NTFS that we have all grown to love. Never fear though, I found a solution that works.

After playing around with different settings and installs, I finally found the best way to install it (for me anyway). Here is what I did:

  1. Boot up with the Ubuntu 9.04 CD
  2. Opened a terminal, and run Gparted

    >sudo gparted

  3. Create an NTFS partion (I used the first half of the disk)


  4. Quit Gparted, and reboot
  5. Boot up with the Windows 7 DVD
  6. When asked where to install, select the ntfs partition you created in step 3 and click next


  7. Windows 7 will install


  8. After Windows 7 Installs, bootup using the Ubuntu CD again and proceed with the install as usual to the empty partition
  9. Ubuntu should now see the Windows 7 partition as a Windows Vista Partition, and now you can dual boot!


In the end, the moral of the story is that if you create your initial partitions with the Windows 7 DVD like you did in previous versions of Windows, then Ubuntu 9.04 will not be able to see the partition as an Operating System. If you use a third party partitioner, like Gparted, and install Windows to that, you will be good to go!

Did any of you have problems dual booting with Windows 7? Did you get it to work a different way? Did your's work out of the box? I want to hear about your experience in the comments!

May 25, 2009

Getting Adobe Air To Work In Ubuntu 9.04 64 Bit

Today I have a good post for you! I recently decided to make Ubuntu 9.04 64 bit edition my operating system for my work computer. I figured why not, the dual monitors thing works pretty good in Jaunty Jackelope without too much finagling.

So I go ahead and install it. Now I am finally using a 64 bit operating system for work! So what's the problem? Well, on my Windows XP installation I had Adobe Air installed so I could use my favorite Twitter client Twhirl. The problem is that Adobe air isn't really made for 64 bit operating systems quite yet, so i had to install some dependencies. Here comes yet another problem.

Most of the tutorials I found mentioned getting the getlibs-all.deb package from a site called boundlesssupremacy.com, but it looks like that site is gone now. I did finally find it though which is good news for you! Also, in some of the tutorials, they talk about some other dependencies you need. I decided to put them all in a nice script for easy installation! Follow these simple instructions and you'll have Adobe Air running on Ubuntu 9.04 64 bit in no time!

  1. Download my shell script: air-lib.sh
  2. Download Adobe Air from here: http://get.adobe.com/air
  3. Open a terminal and cd into the directory where you downloaded the items from 1 and 2
  4. Make the two items executable

    >chmod +x air-lib.sh
    >chmod +x AdobeAIRInstaller.bin


  5. Run my script

    >sudo ./air-lib.sh

  6. Install Adobe Air

    >sudo ./AdobeAIRInstaller.bin

After that you are done, and you should be able to install and run your Adobe Air programs like Twhirl and Tweedeck without issues.

Are you using Ubuntu 9.04 64 Bit? What applications are you having problems with? Got any tips or suggestions? Perhaps some blog posts of your own? Post your links in the comments!

May 15, 2009

Setting Up A Minimal Ubuntu Desktop

Once again my old security professor from college comes at me with some very useful information. This time in the form of an awesome Linux tip. He forwarded me a link to a post from Lifehacker who themselves mentioned a post in the Ubuntu Forums from a guy calling himself TheShiv.

TheShiv talked about how with the default Ubuntu installation there were a lot of pre-installed applications that he did not use that took up a lot of resources, and ultimately slowed the computer down more than it needed to. Fed up with that he wrote a quick script to use after doing an install using Ubuntu Server edition or the Minimal CD. With both of those, Ubuntu installs with just the terminal.

After your install you can wget TheShiv's script which I made available here: (Mini.sh)

For example, after your install from the terminal do the following:


sudo apt-get update
wget http://ftp.bauer-power.net/misc/Ubuntu_Minimal/Mini.sh
chmod +x Mini.sh
sudo ./Mini.sh


Now sit back, grab some coffee and wait for your Minimal Ubuntu install to be pulled down from the repositories to settle nicely on your hard drive!

After installing all the minimal packages, now you can pull down only what you need as far as applications, and you don't have any extras your don't. Doing this type of install saved TheShiv approximately 260MB of typical memory usage. I think I will be doing this for all future releases of Bauer-Puntu ;-)

What kind of things do you do to optimize your Ubuntu (Or other distro) installation? Do you have special scripts of your own? Let us know in the comments!

Technorati Tags: , , , ,


May 6, 2009

Capturing Webcam Video in Ubuntu

Last night I received my new Dell Mini 9 netbook in the mail, and I immediately began playing with it. First thing I did was install Windows XP and Ubuntu 9.04 Netbook Remix in a dual boot setup. The second thing I did was pimp out my new netbook with a Powered By Ubuntu Sticker :-P

After that I started poking around in Ubuntu NBR 9.04. A few weeks ago I was looking into software in Ubuntu that I could use to capture video from my webcam. I wasn’t successful finding anything, and decided to capture my webcam stuff in Windows XP. Since my netbook came with a webcam like many do, I wanted to see what was installed to handle that in the netbook version of Ubuntu. That answer is a program called Cheese.

Here is a description of Cheese from the project website:

Cheese uses your webcam to take photos and videos, applies fancy special effects and lets you share the fun with others. It was written as part of Google's 2007 Summer of Code lead by daniel g. siegel and mentored by Raphaël Slinckx. Under the hood, Cheese uses GStreamer to apply fancy effects to photos and videos. With Cheese it is easy to take photos of you, your friends, pets or whatever you want and share them with others. After a success of the Summer of Code, the development continued and we still are looking for people with nice ideas and patches ;)

I have to say that Cheese worked fairly well, especially for the chintzy 1.3MP camera built in. My only gripes were that it recorded to .ogv format, the resolution had to be set at 320x240 in order to get the video to work. (By default the resolution was set at 1024x768), and finally after recording, the audio and video didn’t sync correctly. Here is my test video:

As you can see, it started off okay, then slowly turned into a foreign Japanese flick looking thing where the audio didn’t sync with my mouth. That was even after I ran the video through Windows Movie Maker to try to sync the sound up!

Have any of you had the sound synching problem with Cheese in Ubuntu? Were you able to fix it? If so how? Hit me up in the comments.

May 1, 2009

Ubuntu 9.04 Wireless On A Dell Latitude D610

Like millions of other anxious Ubuntu enthusiasts, I downloaded the latest version of Ubuntu (9.04 Jaunty Jackelope) and decided to install it on my laptops at home. On one of my laptops, I got the idea for a quick blog post. The motivation? I ran into some problems with wireless on my Dell Latitude D610 laptop. I thought it was a little strange because in the last two or three versions of Ubuntu I didn't have a problem with wireless on my Dell D610.

I am sure it was just an oversight on Ubuntu's part, but it appears that they forgot to include the proper wireless drivers for the Dell D610. Never fear, Bauer-Power is here! Well, Bauer-Power and the power of ndiswrapper. For those not in the know, ndiswapper is a Linux utility to load Windows drivers when a Linux version isn't available.

It seems like we have everything we need right? Not exactly. It turns out that ndiswrapper isn't installed by default in Ubuntu 9.04. That sort of sucks because we are trying to connect to the Internet via wireless right? Oh well, suck it up and walk your fat-ass across the room and plug your laptop into the router with a CAT6 cable, and lets get your wireless working.

After you plug in your laptop install ndiswrapper from the terminal:

>sudo apt-get update
>sudo apt-get install ndiswrapper-common ndiswrapper-utils-1.9


Now that is installed, you need the Windows drivers. You can get them here: (D610 Wireless)

After you download the tarball, right click on it and select 'Extract Here'. Now in a terminal CD into the DellD610 folder that you just extracted from the tarball. Install time using ndiswrapper!

>sudo ndiswrapper -i bcmwl5.inf (Installs the driver)
>sudo ndiswrapper -l (Checks to see if the driver installed)
>sudo ndiswrapper -m (Creates the wlan0 alias)
>sudo modprobe ndiswrapper (Loads the new driver)


After that the driver is installed, but is still not quite activated. To activate the driver click on System> Administration> Hardware Drivers:


Activate the new driver:


Your wireless should now be working. If it doesn't work straight away, try de-activating the driver, the re-activating the driver again. I had to do that a couple of times before I was able to see all of the wireless networks around me.

Did something similar to this happen on your laptop in the new realease of Ubuntu? Were you able to get your wireless to work? Lets hear about your troubleshooting steps in the comments!


Apr 24, 2009

Bauer-Power Episode 7 - (Sorry in Advance)

Alright, I know it has been a really, really long time since Sundance and I got together to do a video episode of Bauer-Power. A lot has happened since the last episode. For one, my wife and I just had a baby boy on the 30th of last month. You and I both know how irritable a pregnant lady can be... Well, some of you know that.

Also, I wasn't happy with the low end HD Camera I was using so I took it back. Then I had the damnedest time trying to find one I actually liked. I finally found one in the Canon FS100. It isn't HD, but at least it has a friggin' mic input which most digital cam corders don't have now.

Also, in the past few episodes Sundance and I got a little carried away trying to do chroma keying, and recording sound separately. It became an editing nightmare to do the chroma keying, then turn around and re-dub in the audio later. It would take me two or three FULL days to get all the editing done for the little bit of crap....err.... high quality video we finally produced.

Anyway, enough about that. I suppose you are wondering why I apologize in the title. Well, like I mentioned above, I took back my HD camera and don't have a camera, so Sundance and I decided to try out filming an entire episode using nothing more than a $77 Logitech web cam. The actual web cam is a Logitech Quickcam Pro 9000. I have to tell you, and you will see, that this camera is great for Skype, but lousy for IPTV shows. The sound barely follows out lips, we are blury when we move, and the resolution rather sucks. Besides that, everything else is great!

Anyway, in the episode we talk about a number of things we have been working on, played with, or have noticed. These things range from Ubuntu 9.04's release yesterday, to Openfire Jabber servers, to WII Homebrew hacks and other stuff. Without further ado, here is episode 7:


All our old episodes can be viewed on our Veoh channel here : (Bauer-Power on Veoh)

Going forward though, all new episodes will be available on our Blip.tv channel here:
http://video.Bauer-Power.net
The reason for the change is Veoh now requires everyone to install the Veoh player in order to watch full episodes. Any video's embedded on other sites only show 5 minute clips. That really doesn't jive with what we use it for, so we made the switch to Blip.tv. I posted a video explanation here as well.

Anyway, back to the video... I know what you are saying, "Don't be so hard on yourselves, it was actually pretty friggin' awesome." To that I say, thanks, but I know you are just flattering us :-P

So what did you like about this episode? What didn't you like? Is there some stuff in particular you would like to see, or hear about in these episodes? We really want your feedback in the comments.

P.S. Next episode, we will use a REAL camera. I promise!


Apr 23, 2009

Ubuntu 9.04 (Jaunty Jackalope) Releases Today

Ah yes! It is that time of year again when we all get a refresh of that Ubuntu goodness. Twice a year those geniuses at Canonical drop a can of pure bad-ass smack down upon us and give us a new release of the most kick-ass FREE operating system ever. Have I ever mentioned that I like Ubuntu?

Anyway, yes, today is the day for Ubuntu version 9.04 (Jaunty Jackalope) to be released! Like always, you can download it from the Ubuntu website at www.Ubuntu.com. For you KDE lovers, you can get the 9.04 version of Kubuntu at www.Kubuntu.org as always. Finally for you XFCE guys Xubuntu can be downloaded from www.xubuntu.org.

So what is new in this version? Here are some bulleted items from the Ubuntu website:

  • GNOME 2.26Ubuntu 9.04 Jaunty Jackelope
  • X.Org server 1.6
  • Wacom tablet hotplugging
  • New style for notifications
  • Boot performance
  • Linux kernel 2.6.28
  • Ext4 filesystem support
  • Cloud computing
  • Turn-key mail servers
For a description of all the new features go here: (Ubuntu 9.04 features)
So I guess we all know what this really means right? Yup, now I have to get to work on Version 9.04 of Bauer-Puntu! Keep an eye out for that!

Also, I am still giving out Free Powered By Ubuntu stickers! Please keep your self addresses stamped envelopes coming!

Have you been playing with the release candidates at all? What features do you really like/dislike? Do you even notice a big difference? Share your experiences with us in the comments!

Apr 20, 2009

Free Secure Instant Messaging For Your Business!

The company I work for has a no instant messaging policy. More precisely, the policy says we are not allowed to use outside instant messaging services like AIM, MSN, GTalk etc. That makes sense right? I mean there is a very real security concern with using public messaging services for business use.

It turns out that our Finance department has been begging and pleading my boss for the use of IM for collaboration between their team, but he has been holding them at bay because of our IM policy. That is until I saw a recent episode of Hak5. In Episode 508, Matt Lestock introduced everyone to Openfire created by Ignite Realtime which according to their site is:

…a real time collaboration (RTC) server licensed under the Open Source GPL. It uses the only widely adopted open protocol for instant messaging, XMPP (also called Jabber). Openfire is incredibly easy to setup and administer, but offers rock-solid security and performance.

Here is the segment of Matt Lestock talking about Openfire on Hak5:

You can catch the full episode here: (Hak5 Episode 508)

As you can see with the video it is really easy to setup. In the video, Matt uses the embedded database. I played with that myself, and I have to say it sucks! I set mine up with MySQL and it runs much better. Also, he set his up on CentOS without Active Directory support. I on the other hand set mine up on 64 bit Ubuntu 9.04 with LDAP support so my company’s users can all login without me having to setup 300 or so user accounts!

Installation is incredibly easy in Ubuntu 9.04. Especially if you are installing it with a brand new installation of Ubuntu server, which is what I did because you need to have Ubuntu setup as a LAMP server. As many of you already know, you can select the option of setting up a LAMP server in Ubuntu server at install time by simply checking the box (See below).

ScreenHunter_02 Apr. 15 13.18

Here is what I what I did after I was done with installing Ubuntu:

  1. Install phpmyadmin for easy MySQL administration

    sudo apt-get install libapache2-mod-auth-mysql php5-mysql phpmyadmin
  2. Edit the php.ini file to make sure it works correctly with MySQL

    sudo nano /etc/php5/apache2/php.ini

    Add the following line to the end: extension=mysql.so
  3. Restart Apache

    sudo /etc/init.d/apache2 restart
  4. Install Java

    sudo apt-get install sun-java6-bin
  5. Create your MySQL database

    Browse to http://servername/phpmyadmin

    Login with root and the password you configured during the MySQL installation

    On the main page, locate Privileges and scroll down to Add a new User

    Use the following on the New User screen:
    Username = Enter a username, I used 'openfire'
    Host = From the drop down menu, select localhost
    Password = Enter a password, retype your password

    Under the Database for user section of that page, click on the radio button for Create database with same name and grant all privileges.

    At the bottom of the page, click on the Go button.
  6. Download Openfire

    wget http://www.igniterealtime.org/downloadServlet?filename=openfire/openfire_3.6.3_all.deb
  7. Install Openfire

    sudo dpkg -i openfire_3.6.3_all.deb

Bam! Now all you have to do is browse to http://servername:9090 and run the setup wizard like Matt Lestock does in the video, with the exception of selecting the MySQL database part. For that you just have to enter the database name, and the database user info that we setup in step 5. Easy!

Now that this puppy is all setup, we people can stop wasting space on the mail servers with lengthy email chains. They can collaborate easier, even across the country, you name it! Also, chat sessions are secure over TLS encryption. Not to mention you can add custom filters to prevent leaks of sensitive information.

One thing it also has the ability to do, which we have not implemented is the option to use it as a IM gateway to talk with other IM services on the internet. That might be fun to do for personal use, but I am not comfortable with that in the office.

If you want to try it out, community support is available on the Openfire website here: (Openfire support)

Happy collaborating!

Apr 9, 2009

Ubuntu n00b? Here's A Free Ubuntu Pocket Guide!

A lot of you out there subscribe to Bauer-Power because you are fellow Ubuntu users, and like hearing about cool Ubuntu tips, tricks, and other geeky Linux goodness. Many of you are Linux n00bs, and that is okay. You have to start somewhere right?

For those of you just dipping your big toes into the big Linuxy pond of Ubuntu there are lots of cool, free resources available online to help you learn the ways of Ubuntu. Just like Bauer-Power, there are other groups that strive to help out Linux n00bs.

One such guy went above and beyond in my opinion. A man by the name of Keir Thomas wrote a pocket guide for Ubuntu, and made it freely available for download online! The book is called "Ubuntu Pocket Guide and Reference."

Here is a direct download link: (UPG&R Download)

For those of you who prefer not to download PDF's, and would rather just purchase a book, the book is also available to purchase for the nominal price of $11.99 here: (Ubuntu Pocket Guide and Reference Purchase)

Seriously though, how cool is that? How many free manuals are there for Windows? I may be wrong, but there probably aren't any (If there are let me know in the comments). Know of any other free linux manuals for say, Gentoo, Fedora, Suse etc? Let us know in the comments!


Technorati Tags: , , , , ,

Jan 3, 2009

Ubuntu Certificate of Authenticity

I decided to bring this one to the top today. You see, I just got a Powered by Ubuntu sticker request in the mail today, and with it the guy asked if there was a sticker to replace the Microsoft Windows License sticker on his computer. That request reminding me of this post I put up a while back. So without further ado, here it is again:

I found the below picture in my internet Stumbles and thought I would repost it. The image is apparently created by some guy on the Ubuntu Forums with the handle of MenZa, who released it with a GPL license, so feel free to re-post, re-distribute or whatever! This should make the transition to Ubuntu for Windows users a little more smooth.


Nov 4, 2008

Changing The Bootup Splash In Ubuntu 8.10 Intrepid Ibex

At the time of this writing, as far as I can tell this cannot be done. What? you don't want to hear that? I didn't either! One of the first things I always do after a fresh install of Ubuntu is change the boot up usplash splash screen.

For some reason there is a bug in the new version (8.10 Intrepid Ibex) that will not let you do this. Sure you can go through the motions, but when you reboot you might see a quick flash of an error saying:

acpid:exiting

When you boot back up... No splash screen, just scrolling white letters!

I also have a laptop that I installed using the Alternate Install CD so I could encrypt the drive. That is even worse. If I try to change the boot up splash it won't boot at all. I have to boot to the recovery option.

For those of you keeping up with the blog, I just released my newest version of Bauer-Puntu Linux, which is a custom Ubuntu based distro without the shit brown, and with pentesting tools pre-installed. I needed a custom splash for that. So how did I do it?

I had to switch splash software, that's how. I uninstalled usplash:

sudo apt-get remove usplash --purge

Then I installed splashy. You can install it with apt-get, but there is a newer version available here:

libsplashy1_0.3.10-1_i386.deb
splashy_0.3.10-1_i386.deb

Download both, and install them both. If you don't know how to install deb packages from the command line, that is okay. You can just double click on them and follow the prompts ;-)

After installing splashy, you will want to edit /boot/grub/menu.lst by adding vga=791 to the end of your kernel boot option like so:

kernel /boot/vmlinuz-2.6.27-7-generic root=UUID=3dca6051-5877-438c-94c5-f5ff7803d851 ro quiet splash

and add vga=791 at the end of it so it reads:

kernel /boot/vmlinuz-2.6.27-7-generic root=UUID=3dca6051-5877-438c-94c5-f5ff7803d851 ro quiet splash vga=791

After you are done, from the terminal run:

sudo update-grub

Now reboot, and you should see a new splashy splash screen in place of the ugly Ubuntu usplash screen.


Here is my customized splashy screen from Bauer-Puntu 8.10:


This of course is just a workaround. If you know of a way to fix usplash in Ubuntu 8.10 I am all ears. Please let me know in the comments, or at least post a link to a how to.

Oct 15, 2008

Bauer-Puntu: Ubuntu Linux Without The Shit Brown

NOTE: New version released! Click HERE!

Friggin' finally! A little while ago I mentioned being able to create your own custom Ubuntu based live cd that you can distribute to friends. I made links available to download the initial one I created in 100MB parts (Lame!)

Well since then I have perfected my distro, and completely customized it. Say goodbye to the Ubuntu shit brown, and say hello to the awesome goodness of Bauer-Puntu!

Just click the File Front Download Now button to get yourself a piece of Bauer-Power!

Bauer-Puntu.iso

[Alternative Download Location]


As requested, here are some screen shots:

Grub Splash


Usplash


GDM Login Screen


Desktop


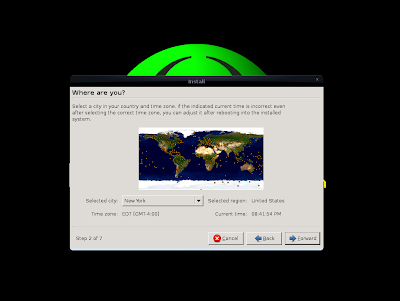
Installer


As soon as as the final version of Intrepid Ibex comes out, I will release a new version! Tell me how you like it in the comments!

P.S. I have pre-installed Kismet and Aircrack-ng for some wep cracking fun ;-)

Oct 6, 2008

Get it while the gettin' is good: Bauer-Power GDM Theme!

Hey guys! I have been busily working on an upcoming article on creating your own custom live cd. In the process I decided to create my own custom GDM login screen for Ubuntu (Or any other distro that uses GDM).

I went ahead and made it available to everyone under a GPL. If you are interested I uploaded it to Gnome-Look.org.

Here is the direct link: (Bauer-Power GDM)

Here is a screenshot:

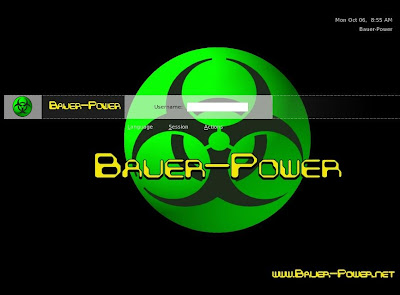
Bauer-Power GDM Theme Ubuntu

Let me know what you think! This is my first try at creating GDM themes, so be gentle.

Oct 5, 2008

I am in love! In love with web-based Linux administration!

As you all know, I recently setup a NAS using FreeNAS. Well, if you read that post, you know that it is administered through a webGUI. So I started thinking to myself, "Self, I wonder if there is a tool like that for Linux!" So I began to look around, and I'll tell you what, it didn't take long to find what I was looking for!

This little miracle is called Webmin. Webmin allows you to do full Linux administration through an SSL encrypted webGUI! It literally allows you to do every facet of administering your server from your browser! Setup for it is a snap too! Before, when I would setup an Ubuntu server, I would install the desktop minus gdm, usplash and any other apps I didn't need. Now, I just install Ubuntu server edition with apache and webmin and call it a day!

To install it, just follow these easy steps:

  1. Install the prerequisites by running:

    sudo apt-get install apache2 perl libnet-ssleay-perl openssl libauthen-pam-perl libpam-runtime libio-pty-perl libmd5-perl

  2. Next, download the deb package:

    wget http://prdownloads.sourceforge.net/webadmin/webmin_1.420_all.deb

  3. Install the deb package:

    sudo dpkg -i webmin_1.420_all.deb

  4. Now you can access your server by browsing to https://servername:10000


I liked this thing so much, I put in a change order to install it on our production Ubuntu GSX server at the office. Now all of the Linux shy admins can move around that server with ease.

Sep 25, 2008

Looking for more games in Ubuntu? Meet Playdeb Beta!

I was browsing Digg the other day and there was a post on "Ten reasons Ubuntu will never beat Windows" or some nonsense. Obviously it was front page material because it caused such a frenzy. The thing that caught my eye though wasn't the article itself, but one of the Digg comments.

The commenter said that Ubuntu, or any other Linux platform, would never beat Windows because there are no games for it.To that guy... I beg to differ.

There are actually tons of games out there for Linux, you just have to know where to get them. Sure, many of these games, since they are free and have no financial backing, cannot meet the graphics levels of some of the more popular PC games, and console games out now. To that I will concede. Some of them though are pretty damned good, and most importantly, they are FREE!

Bauer-Power Linux TuxYou can always browse synaptic package manager in Ubuntu to find a few extra simple games to add to your desktop, but if you want more you have to go elsewhere. I am making the search a little more simple for you today, because I am going to tell you where to get some games!

Its a little place called Playdeb Beta. All you have to do to get access to tons and tons of Linux games is install the package (Instructions are on their website).

Some of the games in their lineup are:

  • Alien Arena 2007 7.10
  • AssaultCube 0.93
  • Glest 3.1.2
  • GridWars 2 2006 03 09
  • Nexuiz 2.4.2
  • OpenArena 0.8.0

That is just a minuscule sampling too! If you are a gamer, and especially a cheap bastard that doesn't like to pay for expensive, mainstream games, then you should definitely check out Playdeb Beta.

Do you play open source games? What are some of the games you are playing? Let us know in the comments!

[NOTE] - Don't forget about your free Powered By Ubuntu Stickers! Click Here for Details!


Twitter Delicious Facebook Digg Stumbleupon Favorites More

 
Design by Free WordPress Themes | Bloggerized by Lasantha - Premium Blogger Themes | stopping spam