Aug 4, 2010

GUI For Cron

Back in my college days, when I was taking Security classes, I remember one of my instructors asking the class if we used scheduled tasks in Windows, or it’s Linux equivalent Cron. Many of the students, not really knowing what the hell they were talking about, and thinking they were spewing out the “correct” answer said they didn’t, because it was an “unnecessary security risk”. To that I say bull crap! I don’t think I could do half the stuff I do without some form of automation. Many times the trigger for said automation comes in the form of a scheduled task or Cron job. Am I right?

So like I mention above, Cron is the scheduled task program for Linux. If you want something to run at a certain time of day, Cron is your man (or app). For instance, I have a Linux server that backs up Cisco configs daily using a tool called Rancid. Well, what do you think makes Rancid run every day? Magic leprechauns? Nope, my man Cron does!

The thing about configuring Cron to run at a certain type of day can be a little daunting to the non-Linux type person, or non-terminal like person. Let’s face it, Windows admins like their GUI’s right? I mean, with the terminal, where the f^(k do you use the mouse? Well, to configure Cron normally you have to edit the crontab file with your favorite text editor like Nano or VI. Also the format isn’t that straight forward. I mean look at it:

crontabOnce you do one or two, it’s not that big of a deal, but what if there was an easier way? Well, there is if you have installed Gnome desktop, KDE, or some other windows manager. The tool is called Gnome-Schedule. Installing it is pretty easy. You can grab it from the software store in Ubuntu, or run apt-get from the terminal like thus:

sudo apt-get install gnome-schedule

Gnome-Cron

Once installed, it is really intuitive to create your own scheduled Cron jobs without having to figure out exactly how to format your Crontab. Who doesn’t like easy right?

[Via TechThrob]

Aug 3, 2010

How To Move SharePoint Databases To Another Drive or Partition

You may have noticed the lack of new content recently around here. If you have read any of my recent posts you may have gotten the idea that I have been pretty busy at work. if you guessed that, you are right! It was like that around here when i first started working where I work, but things settled down and I was able to write more regularly again. I’m sure that will happen soon. It’s the blogger circle of life really.

So I was thinking of stuff to write recently and I was suffering from some writer’s block. That is when I thought about writing about something I had to do recently at work. So here is the back story. We had a Microsoft office SharePoint Server (MOSS) 2007 farm running with a SQL 2005 back end. The data drive on the SQL server was running out of disk space. When i say running out of disk space, I mean I would log in and there would be 0MB left!

I would shrink the databases, and files, truncate logs, and all the usual tricks. That would only free up a few hundred MB of data. Not really anything to write home about. What made matters worse was this SQL server was physical, and all the drive bays were filled. I couldn’t add any more drives. Something had to be done.

I decided to install a new NIC, and connect the server to our iSCSI SAN and provision a LUN for use on the SQL server. The problem was though that I now had to move one or more databases from the drive that was full over to the SAN storage. Here is how I did it!

NOTE: I recommend you take a full backup of your environment before doing this. It is pretty easy to jack this up if you are not careful. I accept no responsibility if you “screw the pooch” on this.

The first thing you will have to do is identify the databases you want to move. I recommend looking at the biggest ones first, as they are what is probably filling up your drive the fastest. That’s what I did anyway. I also tried to pick one that wasn’t used as much.

Now you need to go over to your SharePoint server and run the following command to detach your database from SharePoint. I realize that the command looks like the database is getting deleted, but it isn’t.

stsadm -o deletecontentdb -url http://<your-site's-url> -databasename <Database name>

Repeat this process for each database you are moving. If you can’t find stsadm.exe it is usually located in C:\Program Files\Common Files\Microsoft Shared\Web Server Extensions\12\BIN. I recommend copying it to c:\windows\system32.

Once the database(s) is/are detached from SharePoint, on your SQL server go to each database you want to move to the new drive, then right click, click on Tasks> Take Offline.

SQL take offline


Once the database is offline, right click the database again and select Tasks> Detach.

SQL Detach

No browse to your SQL data directory and locate the .mdf and .ldf database files. If you didn’t know, the .mdf file is the actual database flat file, and the .ldf is the log for the database. Now move them to your new drive or partition. I recommend creating a new folder called SQL with all the same SQL data folders. Once moved go into SQL, right click on Databases and select Attach. Click the Add button and browse to the .mdf file(s) you just moved. You will have to do this one at a time for each .mdf file. Also, depending on what OS you are running, you might have to turn off UAC. Click OK, and you are just about done.

SQL Attach

Now all that is left is to re-attach the database to SharePoint. To do that, go back to your SharePoint server and run the following command:

stsadm -o addcontentdb -url http://<your-site's-url> -databasename <Database name>

Once attached, browse to your site’s URL to make sure nothing is broken. Chances are that if you followed this post, you will be good to go!

Have you ever had to do something like this? Are you running into a similar issue? How did you solve it? Did you do something differently? Let us know in the comments.


Aug 2, 2010

Tech Chop! Ep1 – What is Hardware Virtualization?

As you may or may not know, I decided to create a separate site for my video podcasts. That way I can sort of brand the videos separately, and I can feel free to reach back and re-use content that I have written about here at Bauer-Power. Why not right? Besides, when you hear the name “Bauer-Power” if you have never heard of my blog, you wouldn’t immediately think of it as something that revolves around computers and technology right? Hence the name Tech Chop was born!

In this episode, I decided to answer an email I received from a viewer of the old Bauer-Power videos. His name was Terrance, and he wanted to learn more about virtualization, and what exactly it is. I mean, it’s a cool buzz-word right? Right up there with “cloud computing". It’s funny but virtualization, and cloud-computer actually go hand-in-hand as most cloud computing companies, offer their cloud services by using virtualization!

So here it is, episode 1 of Tech Chop!


Did I miss a favorite virtualization product of yours? Care to share some other benefits of virtualization that I neglected to mention? What virtualization software do you use in your environment? Let us know in the comments!


Jul 28, 2010

D-Link DIR-655 Wireless-N Router with SharePort

by Thom Hiatt, Guest Writer

Years ago my father-in-law had his house wired for internet access in each room of the house. Then came wireless routers, and he installed a G-band unit. Three years have passed and the family is tired of having some "dead spots" around the house. Plus, they wanted the benefit of sharing the printer, without having to purchase a wireless printer. Being a nice son-in-law, I offered to pick up a Wireless N router with a USB port so that they could share the family printer.

My FIL was looking for a great price, and wanted to see what Fry's had to offer. So we made our visit and I must say that the management at Fry's sure is doing something better than in years past. I've avoided that dreaded F-word of a store for years simply due to their sales tactics, rude behavior, and ridiculous return policies. But things have changed a bit and they seem to be nicer over there.

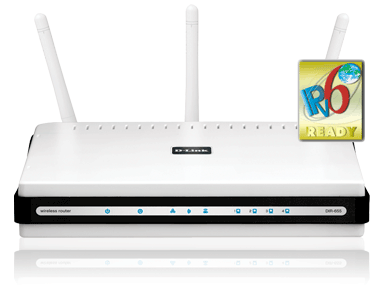
While looking at 'N' routers, we told the salesman that we needed to be able to share the printer. He pointed us to the only option in the house, the D-Link DIR-655 Wireless-N Router with SharePort. $90 plus tax.

After installing it at my FIL's house, we set up access on four laptop computers. Then it was time to plug in the printer. That's where the nightmare begins.

The router comes with SharePort software on CD, necessary for each laptop that needs access to the printer... which means that netbooks can't readily use it because they don't have CD-ROM drives.

After installing SharePort on both full-sized laptops, we started to run test prints. This is where it gets downright ridiculous.

On Laptop 'A' we type a note in Notepad and then click print. Going through the dialog boxes, we print, no problem.

Laptop 'B' now wants to print. What? You mean you want to simply be able to click the print icon and watch your beautiful masterpiece come out of the printer? No, you're not going to get off that easily, pal.

Before printing, Laptop 'B' must open the SharePort program, see that Laptop 'A' is currently connected, then right-click on the Laptop 'A' listing, then request PERMISSION to use the DAMN PRINTER, then wait for Laptop 'A' to GRANT PERMISSION. Once this has all happened, only then can I click the print icon on my document and print away, assuming it works.

In fact, it's so unusually difficult that SharePort has it's own web page with 4 tabs full of instructions. At the very bottom of tab 2, it says, "[when you are connected] This means that no other PC on your network can access it. If you have more than one PC connected to your network and want to print from that computer, you must ask for access."

WTF? So in my house, I have to ask my wife for permission to connect to the printer? Or in my office I have to ask my intern for permission?

Dear D-Link, this is just stupid. Why do you and other companies continue to make tasks so incredibly difficult? Is it that much more complex to put a print server in the router, perhaps like the Apple Airport Extreme?

What's most frustrating is that the D-Link packaging clearly promotes that you can share your printer, but fails to tell you that it will be a pain in the ass to do so. It's also frustrating that the Fry's salesman didn't know enough to warn us.

So the $90 D-Link is going back to the store, for a refund. And now my father in law will need to decide if he wants to 1) buy an Aiport Extreme for $180, or 2) buy a cheaper wireless router and upgrade to a wireless all-in-one printer for a total cost of around $150-200.

Bottom line: I really wish employees of brands would actually use their own products. If they did so, D-Link employees would realize how much SharePort sucks, and they would provide a better solution.

I offer a new slogan for SharePort:

"Share a printer or mass storage device! Sure, it's kind of a pain, and embarrassingly old-school technology, but it's the best we were willing to do!"

Jul 27, 2010

How To Set an IP Address in Windows From Command Line

This is not something you should have to do often, but it certainly is a nice thing to know. Especially if you have to do this on a large group of computers. Being able to do this from command line in a script is nice.

The reason I had to do it was I migrated a DEV server from one VMWare cluster at my company’s home office over to a new DEV cluster at our offsite data center. I was moving it to a new subnet, so I had to change the static IP address of the virtual server. For some reason, when I powered it on and logged in, I was unable to access Network and Sharing Center. It would open up, but nothing would display. It was almost like it hung up on something. I mentioned it to the person who owned the machine, but they shrugged it off like that was just how it was.

Since it is a personal DEV machine, and not a production server I decided not to spend a lot of time troubleshooting it. I did still have to give this thing a new IP address though. Lucky for me, the command line was working fine!

In order to change the IP address and DNS information from command line on a Windows server, you need to use the netsh command. To change the IP address, subnet mask and default gateway run the following:

netsh interface ip set address name="Local Area Connection" static 10.4.0.30 255.255.255.0 10.4.0.1

command prompt

Of course, you will have to change the interface name, and IP information for your environment. The next thing you may want to change is the DNS server information. To change the Primary DNS server run the following:

netsh interface ip set dnsserver "Local Area Connection" static 10.4.0.100 primary

Once again, change this to match your environment. Now to add additional DNS servers run the following:

netsh interface ip add dnsserver "Local Area Connection" static 10.4.0.101

Notice in the above example, I have replaced set with add. Smart right? Once you have those set, you can now check your configuration by running ipconfig /all.

Have any other command line tips you want to share? Hit us up in the comments!

Jul 26, 2010

Free and Easy Open Source Monitoring

We are currently evaluating different network monitoring tools right now at my day time gig. We are currently using a mix of HP System Insight manager, SCCM, and Cacti. Our goal is to consolidate into one, easy to use tool. We have looked at three so far, and are slowly narrowing it down to one.

The one I am going to tell you about isn’t one we are going to use, not because it doesn’t work well, but because it runs on Linux, and my new boss is a Windows guy. He wants us to move away from Open Source solutions because often times they require a bit more time to make them work, while many products made for Windows are designed to work out of the box.

The tool I will tell you about, actually works pretty well out of the box as well. All you do is install it in Linux, and the rest you follow the wizards through a web interface! This makes it easy for those who are not so Linux Savvy.

The tool is called Zenoss Core. It was recommended to me by a former colleague, and what I use4d on it was pretty cool. As soon as we stood it up, it asked a series of questions in a wizard like format, and after about 10 minutes or so, we were “off to the races” with monitoring.

From their page:

[Zenoss Core is] One of the most popular projects on Sourceforge.com, Zenoss Core  is an award-winning open source IT monitoring product that offers visibility over the entire IT stack, from network devices to applications. Features include automatic discovery, inventory via CMDB, availability monitoring, easy-to-read performance graphs, sophisticated alerting, an easy-to-use web portal, and much, much more.

If you’re boss is one of those who doesn’t like Open Source because of a lack of support, there is an enterprise version of Zenoss available too. The enterprise version gives you all the features of Core, plus the following:

  • Zenoss-Core Deep VMware Monitoring
  • Enhanced Windows Monitoring
  • Synthetic Transactions (Web, Email, Database)
  • Predictive Thresholds
  • Fine-Grained Access Control
  • Global Dashboard
  • Distributed Configuration Manager
  • High Availability Package
  • Enterprise ZenPacks
  • Production-level, expert support via phone and email
  • Premium service levels
  • Automated patch management
  • Licensing & IP Assurance

If you must know, the tools we are leaning towards are Orion by SolarWinds because both my new boss, and my coworker are familiar with it, and opManager by ManageEngine because it is similar, but cheaper. It’s funny, but if you look at both of these products side by side, they almost look identical! It’s almost as if opManager copied the source code from Orion when they built it! I suppose it will come down to price on which one we choose there.

If you’re IT department is looking for a new monitoring solution, and you have no qualms about using Linux and Open Source, then I recommend checking out Zenoss Core.

I’m curious to know what you use for monitoring in your environment. Is it free/open source? Is it easy to setup and configure? Do you hate it? Let us know in the comments!

Jul 22, 2010

Free Alternative To Veeam Reporter

Sorry I haven’t been blogging as frequently as I normally do. I have been slammed all of a sudden with a boat load of projects at work. Namely because we have to do a much needed network cleanup, but also to understand how the infrastructure is currently setup. There has been a lot of turnover in the department, and as mentioned in a previous article, with all that turnover comes layers of inconsistent network design.

One of my duties right now is to create a data map of our entire network using Visio. On small networks, that is a simple task, but on vast networks with hundreds of nodes, it becomes a larger task. I mentioned previously that I found a tool that generates topology diagrams for Active Directory automatically. I wanted something that does the same thing, but for virtualized infrastructure.

I looked at Veeam Reporter, but that isn’t free. I’m not sure how much it costs, in fact I am still waiting on a quote from our software vendor, but the fact remains, it isn’t free. While waiting for the quote though, I found something that is free, and does everything I need and more!

The tool is called vEcoShell! Here are some of it’s features from their website:

vecoshell Gather – Access data from multiple standalone ESX Servers or vCenter instances to consolidate information from every layer of the virtualization stack including the operating systems, applications and infrastructure services.


Filter – Easily identify inconsistencies and provide “health checks” on any virtual infrastructure and multi-platform environment with powerful time-saving filters that can be tuned, saved and leverage across the organization.


Remediate – Reduce errors and streamline repetitive administrative tasks by efficiently modifying multiple objects across the infrastructure in a single operation.


Report – Rapidly generate and customize reports for all types of IT- and business-related processes – save and print to a variety of formats such as XML, CSV, HTML and Microsoft Visio.


Integrate - Leverage Windows PowerShell technology across the virtual environment to provide unparalleled integration capabilities with hypervisors, operating systems and application workloads, including support for Vizioncore vControl and Vizioncore vRanger Pro.

This tool provides a GUI front end to VMWare CLI, and PowerGUI that give you many tools that you don’t have in your standard virtualization environment. It also has tools to work with other virtualization technologies like Microsoft Hyper-V!

Besides the Visio diagram automation I was looking for, it also gives you tools to not just report, but also manage your infrastructure better. For instance, It can provide a report on snapshots, their age, and allows you to remove old snap shots all from one place!

So far, this is the best free VMWare management and reporting tool I have ever seen! I highly recommend it to ANY administrator who has to manage virtual servers.

What are some of your favorite VMWare/Virtualization tools? Are they free? If not, how much do they cost? Let us know in the comments!

Note: I received word from Veeam that a free edition of Veeam Reporter is in the works. Here is a link to the details: (Veeam Reporter FREE)


Twitter Delicious Facebook Digg Stumbleupon Favorites More

 
Design by Free WordPress Themes | Bloggerized by Lasantha - Premium Blogger Themes | stopping spam